
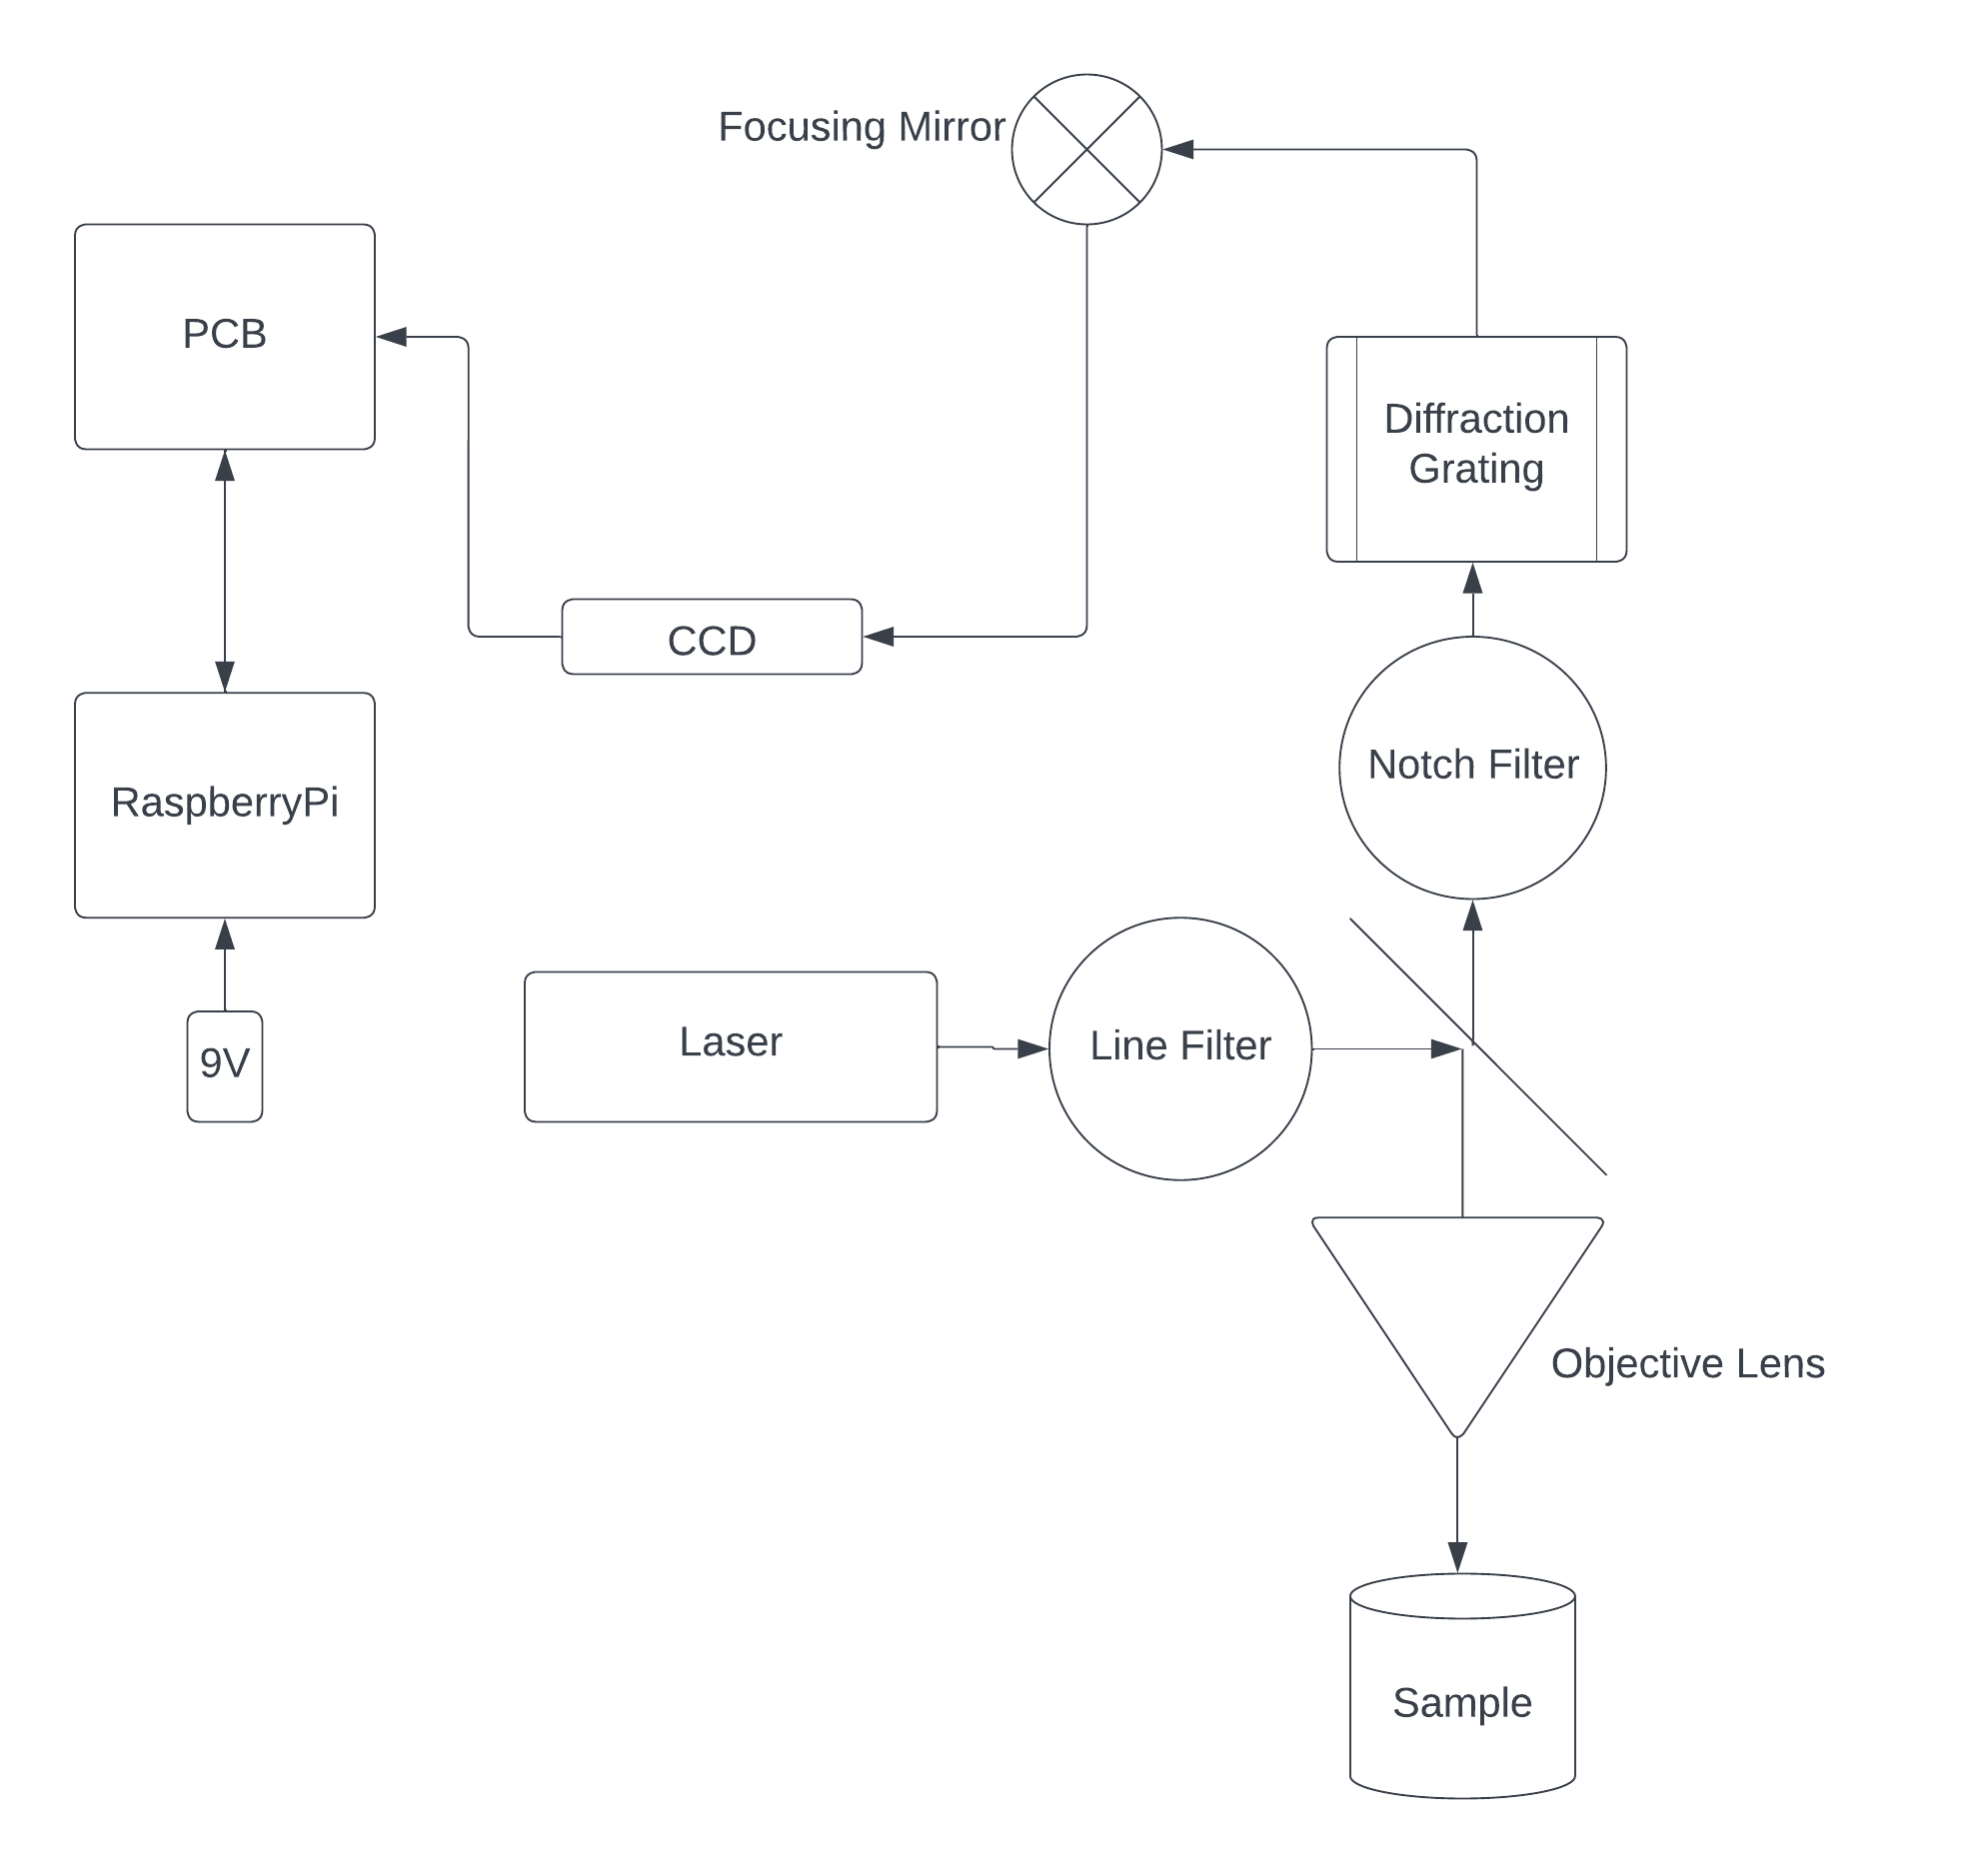
Our hardware block diagram is relatively simple as we have very few components. We have managed to house nearly every electronic component within our PCB, therefore limiting the number of wires we have. We have two main hardware items of interest, the PCB and the RaspberryPi. The RaspberryPi is powered using a 9V battery, that is stepped down to 5V with a step converter. The RaspberryPi in turn powers both the laser and PCB, but only when the system is actually running. The only other wiring we have is a communication channel between the RaspberryPi and PCB which gives the PCB the integration and timing arguments to run the CCD and the data from the CCD upon completion.
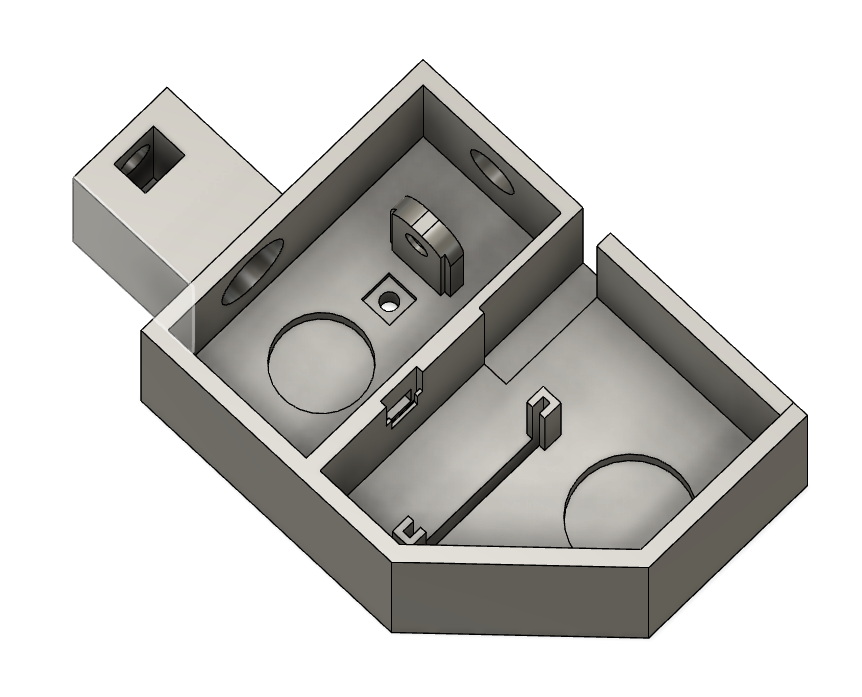
This is our chamber in Fusion360. It measures 184.068mm horizontally and 105mm vertically. The beamsplitter and focusing mirror angles are hard to calculate as they assume ideal paths, so circular mounts were made instead so that they can be easily adjusted. The optical chamber (left) took eight hours to print and the spectroscope chamber (right) took eleven and a half hours. There are many benefits of 3D printing our chamber, including but not limited to near perfect precision of optical components, smaller size, and most importantly, lower cost of prototyping.