How to use this Program
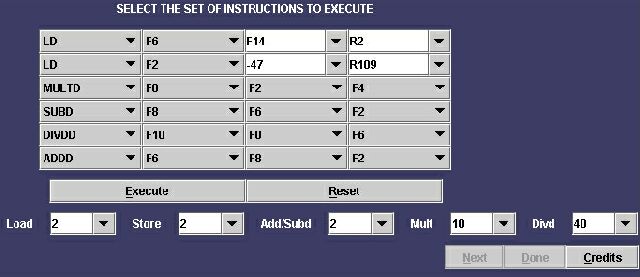
STEP 1: Select The set of instructions you want to execute
For the Load and Store instructions, LD and SD respectively, you can edit the fields of the instruction. The first editable component can be changed to: F0 - F16 or any integer number. The second editable component can be changed to any R#
In all the instruction you can use the popup menu to select a pre-entered value. The same applies for selecting the number of executions for the Functional Units.

STEP 2: Start Execution
To start the execution press the button Execute, or the keys alt-E.
STEP 3: Execute the algorithm step by step
To execute step by step press the button Next, or the keys alt-N.
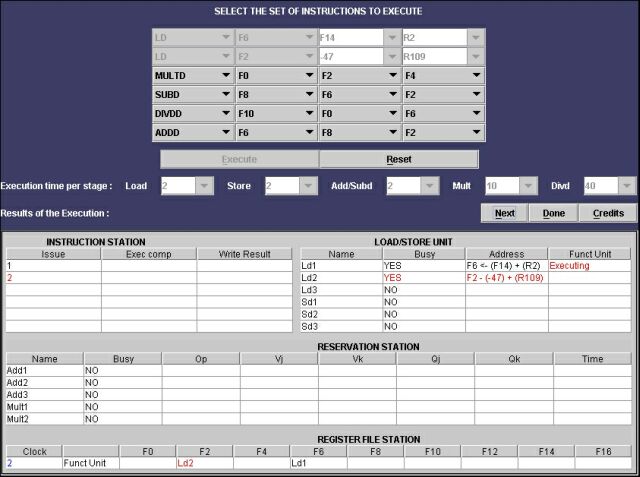
In this example: LD F6,F14,R2, has being issued in the clock 1, the address (F14)+(R2) was calculated, and started its execution in the clock 2, adding the stamp <Executing>. In the clock 2 as well, the next instruction LD F2, -47(R109) was issued and its address was calculated, note that it hasn't start execution yet thus why it doesn't have the stamp <Executing>.
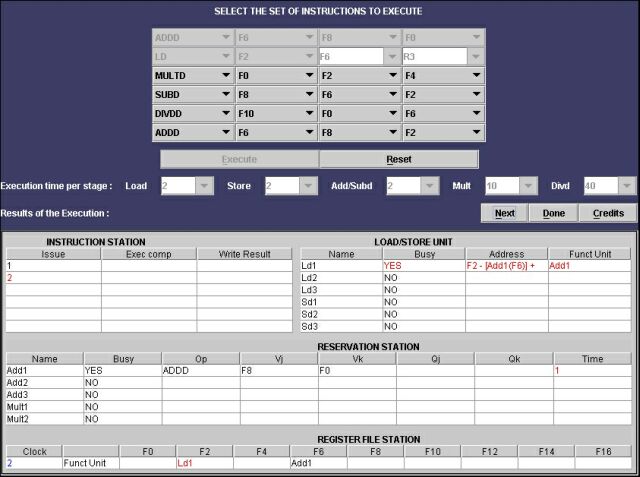
In this example the second instruction LD F2,F6,R3, has data dependency with the first instruction issued ADD F6,F8,F0. Therefore the Functional Unit of the Load/Store Unit is waiting for the result of F6 which is provided by Add1. The Load instruction is issued because there are loads units available but it won't start executing until it gets the result of the Add1.
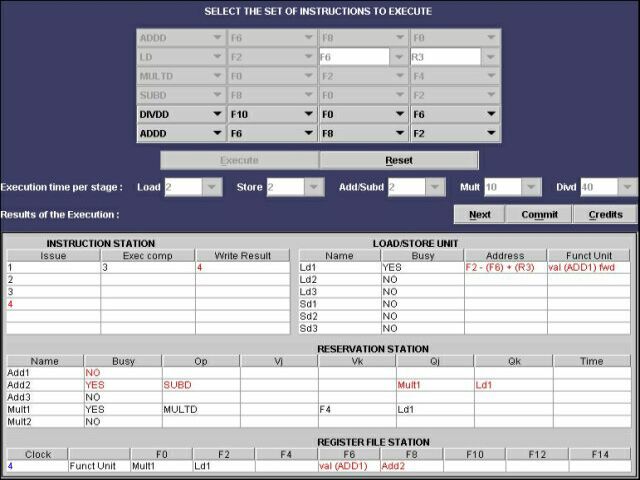
Once the first instruction ADD F6,F8,F0 has finished (clock number 4) it would write "val (ADD1)" to all pending stations, here the caps indicates that the data is coming from the Functional unit Add1; and the prefix val indicates that this is an actual value-result. The Load/Store Unit which was waiting for the result of F6 gets the value in this clock and calculate the address to start execution in the next clock.