CHAPTER XI
INTRODUCTION TO THE ENVIRONMENTAL LABORATORY
A. LABORATORY SAFETY
General Rules. Before entering the laboratory, the following rules must be reviewed and understood:
1. Animals are not permitted in the Environmental Engineering Laboratories.
2. Walkways should be kept clear of obstructions (e.g., bicycles).
3. Eating, drinking and smoking are not permitted in the laboratory areas.
4. Mouth pipetting is forbidden; always use a pipetting bulb.
5. Avoid very loosely-fitted clothing. A white lab coat is recommended. Always wear shoes. Safety glasses are recommended.
6. Never work alone in the laboratory. If you must work after hours, be sure that someone else is in the lab area who can provide emergency assistance.
7. Volatile reagents or chemicals likely to emit hazardous fumes should be kept in a vented chemical cabinet or an explosion-proof refrigerator, and used only in an explosion-proof fume hood.
8. Never work with a volatile solvent near an open flame.
9. Never leave flames unattended.
10. Promptly clean up all chemical spills. Acids and bases may be first neutralized with powdered sodium bicarbonate.
11. Always read precautions on reagent bottles before opening. Refer to chemical data sheets when precautions are unclear.
12. Gas cylinders should always be strapped to a wall or bench. Always remove regulator and replace cap before moving a gas cylinder.
13. All chemicals, solutions, samples, etc. that are to be stored for more than a few hours must bear a stick-on label which includes the following information: identity of sample, solution, etc.; date; name of researcher; special precautions, if any. Only numbered BOD bottles are exempt.
14. Wear goggles, lab coat, and gloves when mixing strong acids and bases. Concentrated nitric, acetic, and hydrochloric acids should be used under a hood. Use only borosilicate (e.g., pyrex, kimax) glass bottles. High sodium glass will crack under the heat of dissolution of strong acids and bases. Always add the acid or base slowly to water; never the reverse.
15. Wear gloves and work under a fume hood whenever using toxic substances.
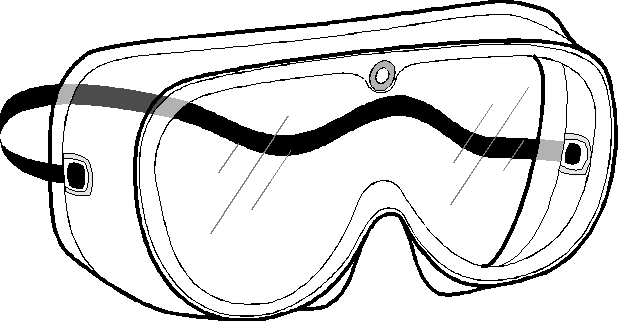
Laboratory Goggles
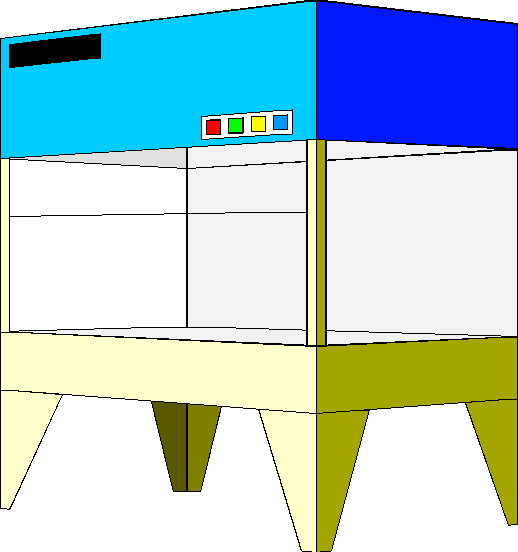
Free-standing Laboratory Fume Hood
Note: Many types of protective gloves are available (Perkins, 1987; NSC, 1988). Latex and natural rubber are very flexible, but they offer little resistance to organic solvents. Neoprene (or chloroprene) offers better resistance to chlorinated solvents, and nitrile (made from acrylonitrile and butadiene) is better still. Viton, however, is clearly the most protective (and most expensive), especially with PCBs, benzene, aniline. Butyl rubber is also quite good.
You should also become familiar with the laboratory shower, eye-wash, fire extinguishers and fire blanket. If you believe you may have had skin contact with a chemical or solution, immediately wash with soap and water.
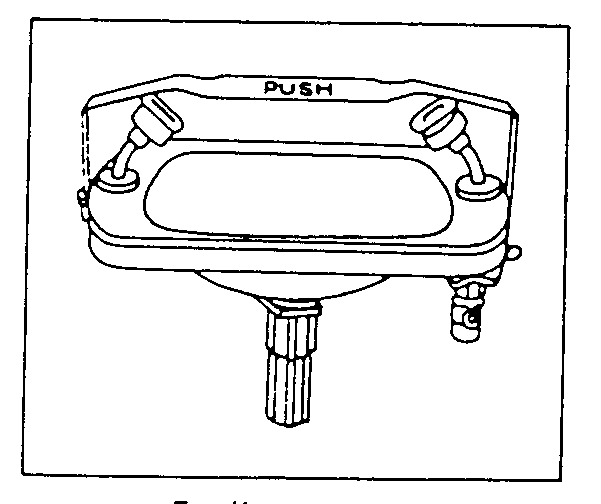
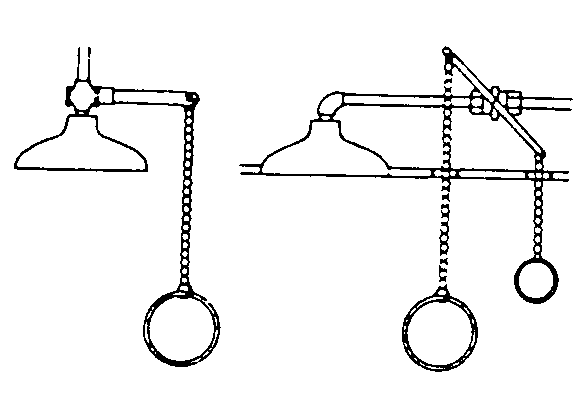
Eye Wash Showers
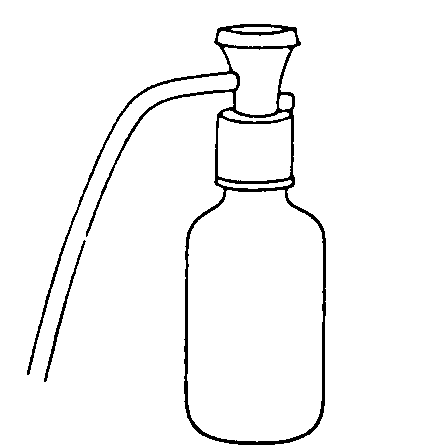
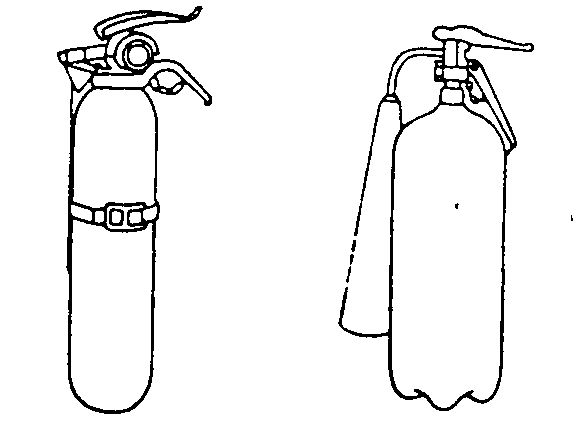
Eye-wash Bottle Fire Extinguishers
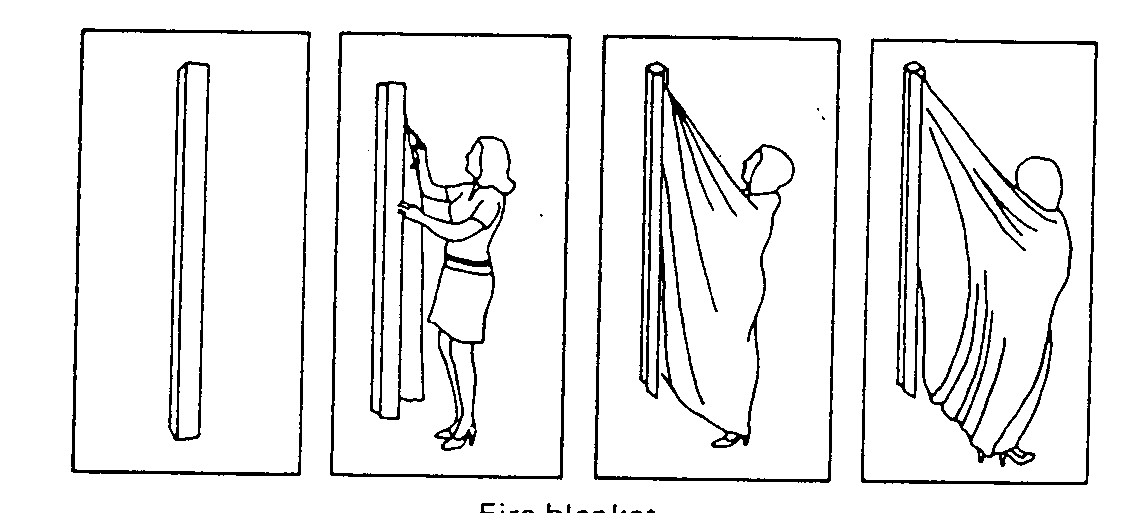
Fire Blanket
Disposal of Chemicals. Most non-toxic solids can be discarded as normal trash. Non-toxic acids and bases can be slowly poured down the sink while flushing with large amounts of tap water. Neutral non-toxic solutions may also be poured down the sink. However, substances that are toxic, flammable, carcinogenic, or explosive must be treated as hazardous wastes. These substances are generally stored separately in glass containers for disposal by the UMass Office of Environmental Health and Safety (5-2682). Most of the chemicals used for the analysis of conventional pollutants are not considered hazardous wastes. However, many advanced or instrumental methods in environmental analysis require the use of organic solvents and halogenated organic compounds that must be disposed of as hazardous wastes.
B. RECORD KEEPING
Laboratory Notebook. It is essential that all raw data be recorded in a bound notebook at the time of data collection. Many environmental researchers use paperbound laboratory notebooks containing numbered pages with tear-out carbons. This is an excellent system, because the carbons can be stored separately so that it is unlikely that both the carbons and the original could be inadvertently lost or destroyed. If you anticipate conducting lab work for your research, you may wish to purchase a full-size lab notebook (Campus Center, University Store) for use in this course. Otherwise, a small and inexpensive bound notebook will suffice.
It is important that the laboratory notebook remain in good physical condition and legible for a long period of time. For this reason use only ball-point pens, do not use felt-tip pens or pencils. Black ink is preferred, but blue is also acceptable. Do not try to erase mistakes. Instead, draw a line through the erroneous entry and record the correct entry nearby. Write legibly, but don't be overly concerned with neatness. Pages must be used consecutively. Leaving a page or pages blank for later use is not good practice. Entries must be presented in chronological sequence and dated. Time of day should be indicated at least every 3 hours. A good practice is to reserve the first page as a periodically-updated table of contents. Avoid excess detail, so that the table of contents can completely fit on one page.
As you plan your experiments you should also think about how you will record data in the lab notebook. This will not only help to produce an organized notebook, but it may lead you to recognize a deficiency in your experimental procedure while you still have a chance to correct it. Data are often best recorded and presented in tabular form. For some repetitive procedures, standardized report forms may be most convenient. These forms should be numbered consecutively and kept in a separate notebook. Reference should be made in the laboratory notebook to the specific report form as appropriate. You should present a complete record of your experiments. All steps in a procedure should be recorded, even if they seem trivial. Very often it is the fine details which take on great importance in retrospect. Record all of your observations. Refer to standard or published procedures whenever possible. However, carefully describe any deviations you may have taken from these procedures. You should also describe any unusual aspects of the laboratory environment. For example, the smell of fresh paint, new asphalt, etc. may indicate possible sources of atmospheric contamination of laboratory solutions. (for more guidance, see Writing the Laboratory Notebook, by Kanare, ACS Publishers, 1985).
C. GLASSWARE AND RELATED EQUIPMENT
General Notes on Lab Glass. Glass is the preferred material for most laboratory purposes. It is resistant to nearly all chemicals except hydrofluoric acid. However, prolonged exposure to strong bases should also be avoided. Only the fluorocarbons are more chemically resistant. Most laboratory glassware is composed of borosilicate glass such as pyrex or kimax. This material has excellent chemical resistance, and may be heated to high temperatures without risk of breaking or significant deformation. Unfortunately, many reagent bottles are made of high sodium glass. These vessels may shatter under extremes of temperature.
Many types of glassware are equipped with ground glass joints. These allow one to assemble all-glass apparatus without the need for corks or rubber stoppers. Bottles made of high sodium glass are often fitted with low-quality ground glass stoppers. These may not seal well, and they cannot be used with the standard interchangeable joints. Borosilicate glassware will have more carefully ground surfaces. The most common joints are the conical type (cone and socket), although spherical joints may also be used. Most conical joints have the "standard taper" of 1 mm change in diameter for every 10 mm in length. Standard taper joints are designated by a two number system. For example, the common "24/40" joint has a maximum diameter of 24 mm and a ground surface length of 40 mm. These are made to be interchangeable, so that any 24/40 cone should fit any 24/40 socket.
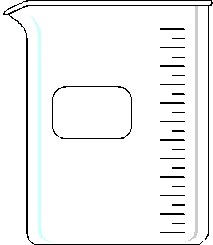
Non-volumetric Glassware. The least expensive types of glassware are the non-volumetric pieces. For this reason, operations in the laboratory not requiring precise measurement of volume or those occurring after or prior to volume measurement are best conducted with non-volumetric glassware. Beakers and flasks may be stored either in drawers or cabinets. They are best left upside down so that their interiors are not contaminated by settling dust.
Beakers. Beakers are most often used for mixing solutions, and dissolving solids in water. Solutions in beakers may be protected from atmospheric dust by placing an appropriately sized watch glass over the top.
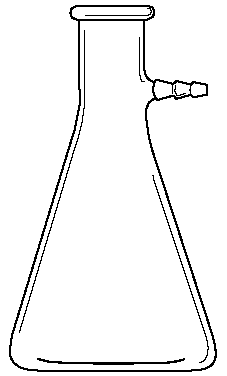
Erlenmeyer Flasks. Erlenmeyer Flasks are frequently used as the receiving vessel during titrations. Some are made with ground glass stoppered tops. These may be used with reflux condensers (COD test) and other specialized glassware for a variety of purposes.
Reagent Bottles. Reagent bottles may have either flat-topped or round-topped stoppers. The flat-topped stoppers may be placed upside-down on the lab bench while the reagent is being dispensed. The round-topped stoppers must be either held between the fingers or set down on a clean watch glass, or in a clean beaker during use.
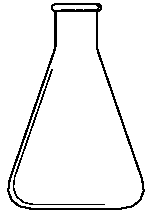
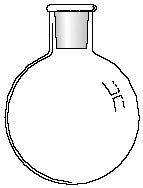
Beaker Erlenmeyer Flask Boiling Flask
Volumetric Glassware. Volumetric glassware always contains one or more circular etched lines. When the bottom of the liquid meniscus just touches that line, the volumetric glassware is ready to either deliver the rated volume (pipets); actually contains the rated volume (flasks); or can be read to determine the precise volume delivered (burets). Volumetric glassware should be read with your eyes at the level of the meniscus, in order to avoid parallax errors. This is especially important when making buret readings.
Volumetric glassware is rated at 20oC and should always be used at or near that temperature. This is necessary, because glass expands and contracts much less than water, so that changes in temperature change the mass of water contained or delivered by volumetric glassware. Burets and pipets should be stored in drawers. Frequently used pipets may be kept upside down on the bench top in a specially designed pipet rack. Volumetric flasks should be stoppered and stored upright in wall cabinets. Volumetric glassware should be dried at room temperature. However, it need not be perfectly dry before re-use. It is a good practice to pre-rinse volumetric glassware in the liquid to be transferred, especially when the glassware is not perfectly dry. There is no need to fill the glassware with liquid, just add a small amount, swirl to wet all surfaces, and discard the rinse solution.
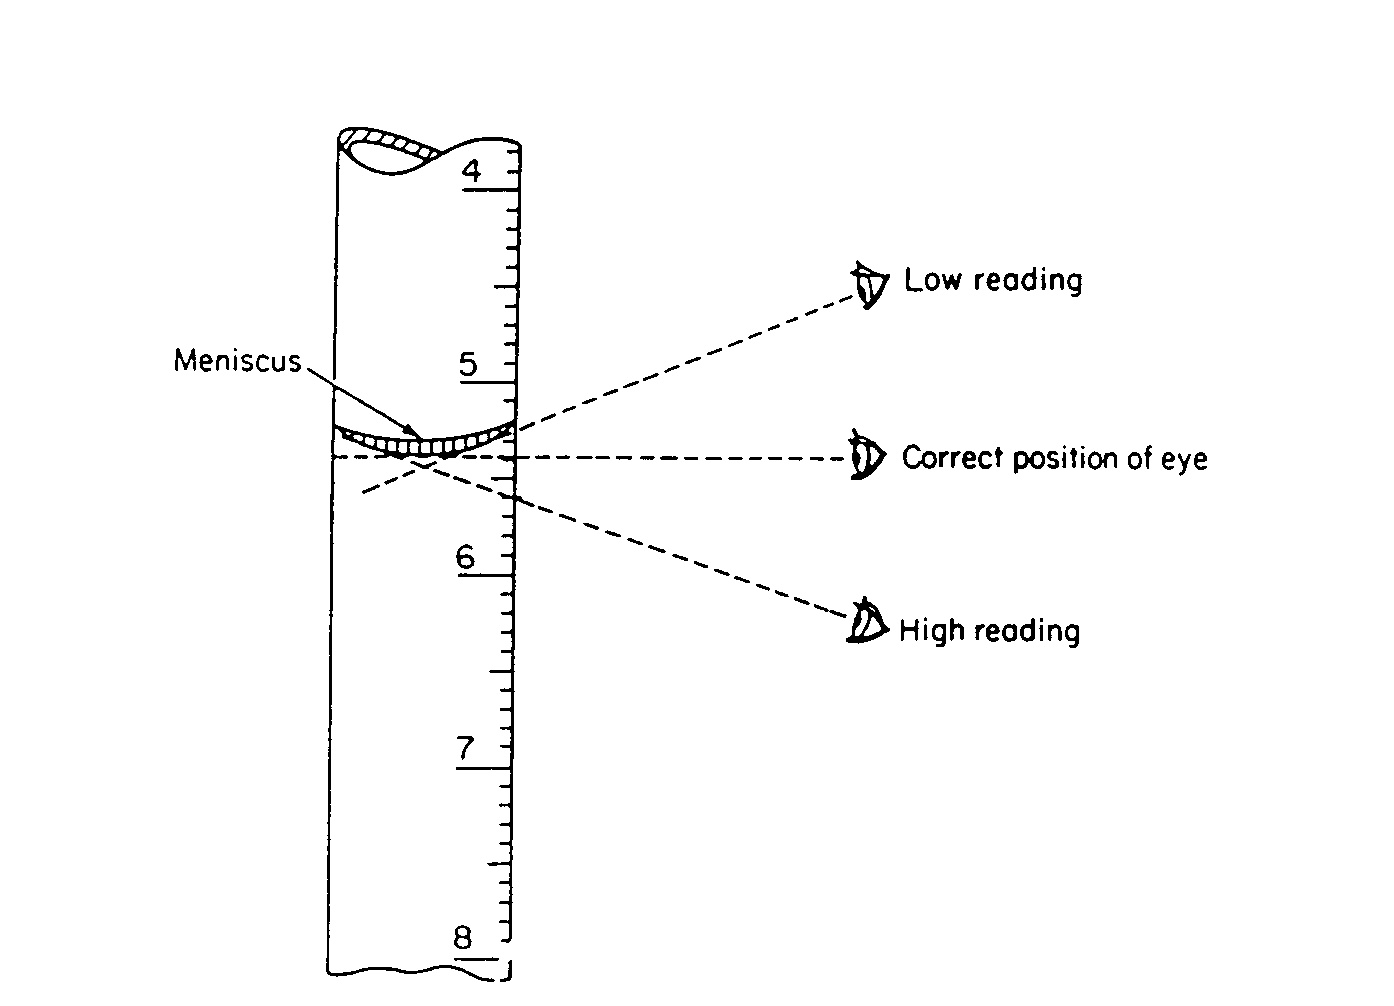
Technique for reading a meniscus
TABLE 11.1
Maximum Allowable Errors for Class A Volumetric Glassware
|
Capacity (mL) |
Volumetric Flasks |
Volumetric Pipets |
Burets |
Graduated Cylinders |
|
1 |
0.006 |
|||
|
2 |
0.006 |
|||
|
3 |
0.01 |
|||
|
5 |
0.02 |
0.01 |
0.01 |
|
|
10 |
0.02 |
0.02 |
0.02 |
0.10 |
|
25 |
0.03 |
0.03 |
0.03 |
0.18 |
|
50 |
0.05 |
0.05 |
0.05 |
0.26 |
|
100 |
0.08 |
0.08 |
0.10 |
0.40 |
|
500 |
0.15 |
1.3 |
||
|
1000 |
0.30 |
3.0 |
||
|
2000 |
0.50 |
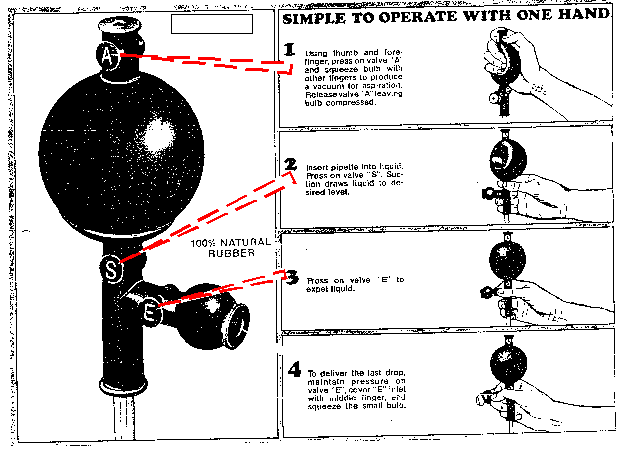
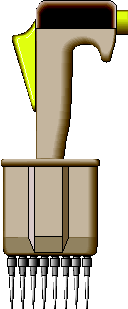
Volumetric Pipets. Pipets are used to accurately measure out volumes from 1 mL to 100 mL. Larger volumes can be handled with volumetric flasks; smaller volumes with micropipets and syringes. Two types are available; the highly accurate fixed-volume transfer pipets, and the more flexible measuring pipet. They are filled by creating a suction with a pipet bulb. Never pipet by mouth! We often use Fisher 3-way pipet bulbs. Be careful not to draw liquid into the pipet bulb. If this happens, the $18 bulb may have to be discarded.
Pipets of 1 mL or greater are generally designated "to deliver" (i.e., TD). This means that they will deliver the stated volume when filled to the mark and allowed to drain by gravity while the tip is just submerged or contacting the side of a receiving vessel. You should wait about 20 seconds after all of the liquid has discharged to be sure that the meniscus has reached the correct, equilibrium level. Thus, the last small amount that remains in the tip due to capillary forces must not be forced out. Gently, wipe the outside of the pipet tip with a kimwipe. Note that you should also contact the pipet tip to the vessel while drawing up liquid. Always rinse pipets immediately after use. It is very difficult to remove dryed deposits from the insides of pipets.
Volumetric Flasks. Volumetric flasks are most commonly used for the preparation of standard solutions. Volumetric flasks are normally designated "to contain" (i.e., TC). This means that in order to deliver the stated volume, the liquid must be quantitatively transferred. Volumetric flasks often have round-topped (pennyhead) stoppers which must be either held between the fingers or set down on a clean watch glass, or in a clean beaker while filling or emptying the flask. Some volumetric flasks have polyethylene snap caps in place of ground glass stoppers.
Burets. A buret is a very precisely formed glass tube with calibrated gradations throughout most of its length. Near the lower extremity it contains a stopcock and drain tip. Note from Table 11.1 that the smaller the buret, the smaller the error. Thus you should always use the smallest buret that will completely deliver the total anticipated titrant volume. Proper use of burets will be discussed in the lab #2 handout (Acid/base titration).
Graduated Cylinders. Graduated cylinders are commonly used when highest accuracy is not required, especially when odd volumes must be measured. Most also come with polyethylene safe-gard bumpers to prevent breakage in case of tipping.


![]()
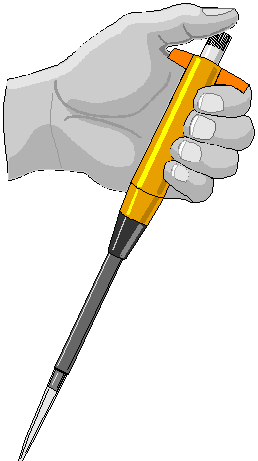
Burete Multichannel pipetter Dispensing Bottle Volumetric Pipet Pasteur Pipet
Liquid Dispensing Devices
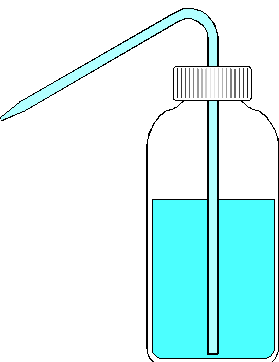
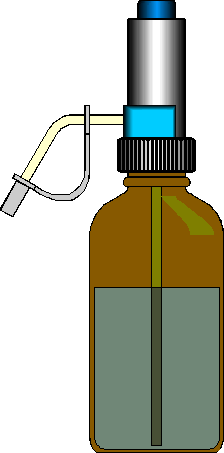
Eppendorf Pipetter Squeeze Bottle
Liquid Dispensing Devices (cont.)
Buret. Burets are available both with glass and teflon stopcocks. The traditional glass stopcocks must be lubricated with silicone grease. It is usually held in place with a metal tension clip. The teflon stopcocks do not require grease. They are held in place with a teflon washer and nut. The two types of stopcocks are not interchangeable, as they have different tapers. Burets equiped with glass stopcocks will often become contaminated with silicone grease. The beading of water on the inner surface, especially below the stopcock, is indicative of this type of contamination. Be sure that when the buret is full, the tip below the stopcock does not contain any air bubbles. If an air bubble exists here at the start of a titration, it may slowly fill in and introduce significant error. Burets are often used with a loose fitting cap for the purpose of keeping dust out and vapors in.
Be sure that your eyes are at the same height as the meniscus when you read a buret. In this way you minimize error due to parallax. Parallax causes one to overestimate the liquid height when looking at the meniscus from above and vice versa. Be sure that there is no liquid clinging to the inside walls of the buret above the meniscus.
Filtration Apparatus. Filtration, or the separation of solids from liquid, is a very important step in gravimetric analysis. The most common labware used for filtration is the "Millipore-type" apparatus. This consists of a glass or plastic base which supports the filter disc, and a cylindrical reservoir that sits on top of the base. The entire assembly fits on a filter flask by means of a rubber stopper. Typically, the filter flask is connected in series to another filter flask which is ultimately connected to a vacuum. The second filter flask serves as a safety barrier to minimize the chance that liquid will drawn into the vacuum source.
Most environmental filtrations will use either membrane filters or glass fiber filters. The former have better defined pores, and therefore, they result in sharper and more accurate separations. The membrane filters are most commonly used for microbiological determinations. The glass fiber filters, however, are cleaner and more inert than the membrane filters. They are also quite heat resistant. The glass fiber filters are generally used for thermo-gravimetric analyses and for trace organic analysis.
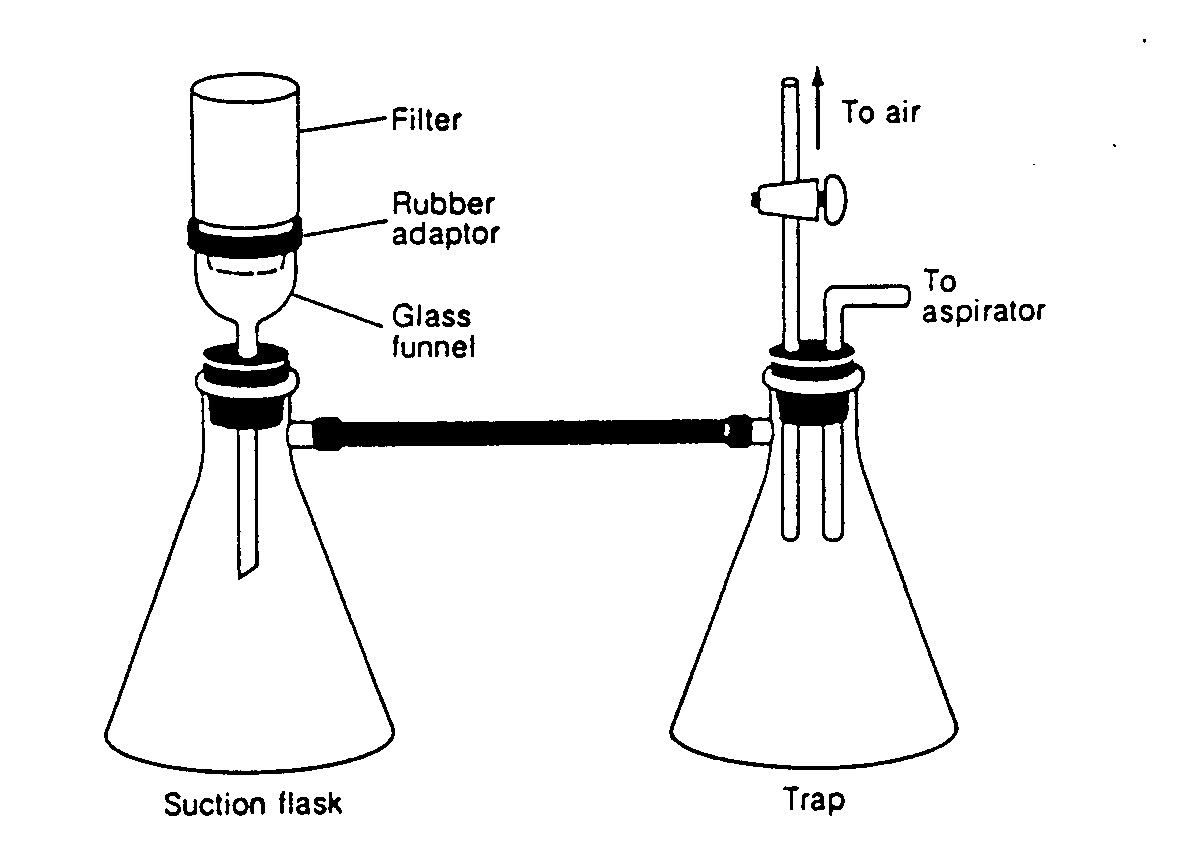

Filter Flask Typical Filtration Apparatus Syringe filter
Filtration Equipment
It is often necessary to stirr and even heat freshly prepared solutions to accelerate dissolution of solids. This is done most conveniently with the aid of a magnetic stir plate and a teflon-coated stir bar. Heat can also be used with caution. Small hot plates are common laboratory items. In some cases the functions are combined in one "hot plate stirrer". Be careful never to heat a solution in an air-tight vessel (e.g., a capped volumetric flask).
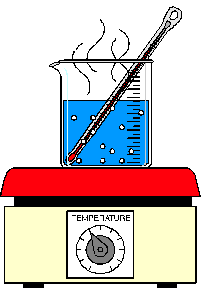
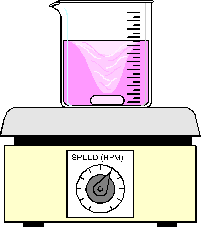
Hot plate Magnetic Stirrer
Heating and Mixing Equipment
Desiccator. This is a glass container used to bring samples to a controlled but very low moisture content. The precise moisture content is defined by the desiccant used. For most environmental work, a commercially available indicating form of Drierite is used (CaSO4.H2O). The indicating beads turn from blue to pink when the desiccant becomes exhausted. At this point it can either be replaced or regenerated by heating at 110oC for 24 hours. The desiccant is usually stored at the bottom of the desiccator, and samples are suspended above the desiccant by means of a perforated ceramic plate.
There are two basic desiccator designs: the circular all-glass desiccators; and the stainless-steel and glass, cabinet desiccators. The cover and bottom of the circular desiccators are usually sealed with silicone grease. Some desiccators also have a port on top for connection to a vacuum line. Samples should be allowed to cool before introducing them into a desiccator. Otherwise pressure may build up and the cover can pop off and shatter. When opening circular desiccators, always slide the cover off slowly, never pull up.
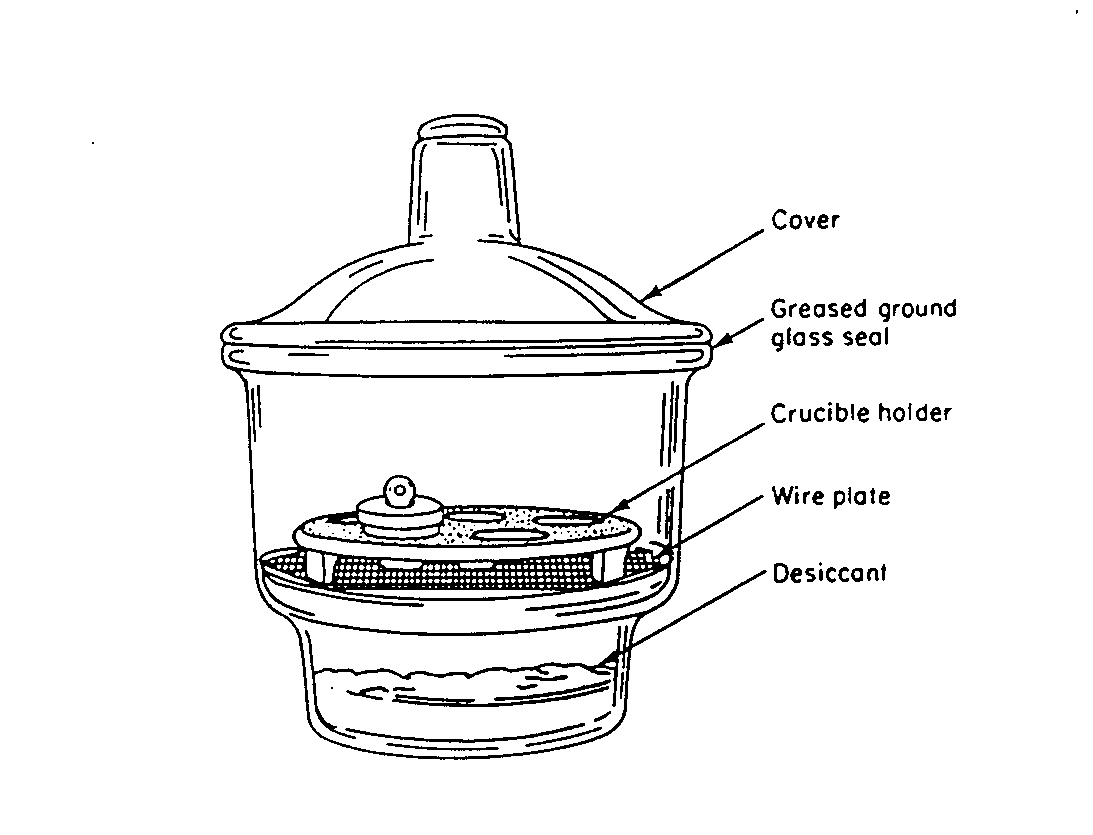
Typical Cylindrical Desiccator
TABLE 11.2
EFFICIENCIES OF DESICCANTS
|
Desiccant |
Formula |
Equilibrium Atmos. Moisture (µg H2O) |
|
Magnesium Perchlorate, Anh. |
Mg(ClO4)2 |
0.2 |
|
"Anhydrone" |
Mg(ClO4)2.1-1.5H2O |
1.5 |
|
Barium Oxide |
BaO |
2.8 |
|
Alumina |
Al2O3 |
2.9 |
|
Phosphorus Pentoxide |
P4O10 |
3.6 |
|
Lithium Perchlorate, Anh. |
LiClO4 |
13 |
|
Calcium Chloride |
CaCl2 |
67 |
|
"Drierite" |
CaSO4 |
67 |
|
Silica Gel |
SiO2 |
70 |
|
"Ascarite" |
NaOH on asbestos |
93 |
|
Sodium Hydroxide |
NaOH |
513 |
|
Barium Perchlorate |
Ba(ClO4)2 |
599 |
|
Calcium Oxide |
CaO |
656 |
|
Magnesium Oxide |
MgO |
753 |
|
Potassium Hydroxide |
KOH |
939 |
There are may other types of common apparatus and equipment used in the environmental laboratory. Below are a few examples that you are likely to use. The electrodes and meters will be described in greater detail in chapter XVIII. The various analytical balances are presented in chapter XV.
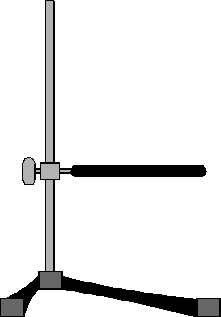
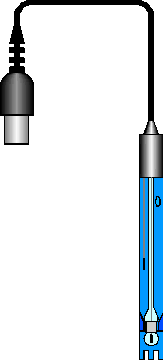
Ring Stand Electrode
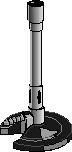
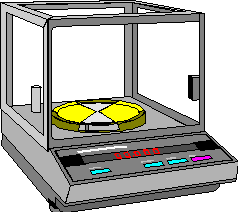
Bunsen Burner Top Loading Balance
Miscellaneous Laboratory Equipment
D. CLEANING PROCEDURES
Glassware Cleaning. For the successful analysis of environmental samples, it is imperative that glassware be scrupulously clean throughout all "crucial" steps of the analysis. Although an experienced analyst will know which steps are crucial, and where a less rigorous cleaning regimen is appropriate, the beginner will not have this advantage. Thus you are advised to always use one of the following procedures:
General Use. Soak for 10-15 minutes in warm detergent solution. Avoid soaking for very long periods of time, as this may tend to roughen the glass surface (A variety of commercially available laboratory detergents may be dissolved in tap water for this purpose; e.g., 1% Alconox, 2% RBS-35). Rinse 3 times with tap water, followed by 3 rinses with distilled water. In the UMass Environmental Engineering laboratories, we often use a 10% hydrochloric acid rinse just prior to the final 3 rinses with distilled water. Place clean non-volumetric glassware upside down in a 110oC drying oven. Volumetric glassware may deform and loose their precision upon extended heating, therefore, they must be dryed at room temperature. This is the procedure we will be using for most of the experiments in CE 572. The removal of silicone grease presents a special challenge. It should be mechanically removed with kimwipes and pipe cleaners to the extent possible. Chemical removal is best achieved by a series of acid/base soaking cycles. Sometimes and ultrasound bath can be used to remove stubborn particles that may cling to glass surfaces. These devices should be filled with water when in use.
Trace Organic Analysis. Rinse first with distilled water. Then soak for 20 min in chromic acid bath. Chromic acid may be prepared from commercially available chromerge or according to directions on the bottle (add slowly to a 9 lb bottle of conc. sulfuric acid), or by simply dissolving 25 g of sodium dichromate in 15 mL of water and slowly adding 500 mL of concentrated sulfuric acid. The eventual appearance of green Cr(III) indicates that the solution is exhausted. This cleaning procedure is commonly used for pesticide analysis by gas chromatography. Chromic acid should never be heated! It should always be used in a hood or in a covered bath to prevent atmospheric contamination. Hot chromic acid, or chromic acid contaminated with chloride may give off toxic, and even carcinogenic, fumes. A less toxic substitute called Nochromix is commercially available. Although it may be a less powerful oxidant, this product is preferred over chromic acid for reasons of safety.
Trace Inorganic Analysis. Rinse first with distilled water. Then soak in re-distilled nitric acid. This procedure is commonly used for heavy metal analysis by atomic absorption spectrophotometry. Some soak glassware in a hot dilute (0.004M, pH 12) solution of EDTA for 20 minutes to remove metal ions.
Oxidant Analysis. Rinse first with distilled water. Then soak overnight with the appropriate oxidant solution. Use a solution that is slightly more concentrated than the unknowns. In some cases it may be most convenient to leave the glassware in a permanent oxidant soak (e.g., chlorine demand free glassware). Other oxidants may be too transient, and glassware must then be prepared immediately before use (e.g., ozone demand free glassware). This procedure is commonly used for the analysis of residual chlorine.

Drying Oven
Ultrasonic Bath
E. LABORATORY REAGENTS
Water. This is the most frequently used "chemical" in the environmental laboratory. Laboratory water purification systems commonly have continuous resistivity monitors. These provide a non-specific measure of the concentration of ionic species in the product water. Theoretically pure water has a resistivity of about 18 megohms, and as the concentration of ionic species increases the resistivity decreases.
Tap Water. Tap water may be severly contaminated with organic and inorganic matter. It should only be used as a pre-rinse for the general cleaning of glassware, and for cleaning spills and laboratory bench tops.
Distilled Water. This is tap water that has been processed through an all-glass (usually) still. It will be much purer than tap water, but it still may contain unacceptable levels of organics or inorganics for certain types of trace analysis. Most laboratory solutions used in CE 572 may be prepared from distilled water. The Corning still in Marston 24 must not be left on unattended as it may overfill the reservoir. The cooling water must be set at the desired flow before turning on this still.
Reverse Osmosis (Milli-RO) Water. This is water that is partially treated by the Super-Q system in Marcus Room 5A. It is of lower quality than the fully-treated Super-Q water, but can be produced more rapidly and in greater quantity. When working properly, product RO water should have: <10% of the tap water monovalent ions; <5% of the tap water divalent ions; and <1% of the tap water high molecular weight organic matter (>300 amu).
Super-Q Water. This is tap water that has been processed through a series of purifying cartridges containing reverse osmosis membranes de-ionizing resins, filters, and activated carbon. The Super-Q water (sometimes referred to as Milli-Q water) represents the highest purity commonly available for environmental trace analysis. When working properly, this system should produce water of 18 megohm resistivity, and it should contain less than 50 ppb total organic carbon. Standard solutions for trace analysis must be prepared from Super-Q water. Super-Q water should be used within a few minutes of processing. Upon storage, Super-Q water will eventually become contaminated.
Other. Some uses require water free of substances normally present at trace concentrations in distilled or RO water. When this is the case, specialized procedures for water purification may be necessary. For example, the analysis of trace levels of ozonation byproducts in drinking water requires dilution water free from formaldehyde. This particular compound is ubiquitous in the laborotory environment, and it is very difficult to remove by most water purification systems. It may, however, be partly removed by adding potassium permanganate to the source water (i.e., boiling reservoir) of an ordinary glass still. A more effective treatment is to irradiate Super-Q water with high-energy ultraviolet light for 30 minutes. This is done using the commercially-available "OrganiPure" unit. Such water must be used immediately upon preparation in order to assure that it does not become recomtaminated by laboratory air.
Chemical Reagents. Laboratory reagents may be purchased at a variety of chemical purities. Grades labeled "Technical" and "USP" are usually not appropriate for environmental work. Purities such as "Analytical Reagent Grade" and "ACS Grade" are acceptable. Information on the maximum concentrations of chemical impurities are often listed on the bottles. Certain types of chemically stable reagents that are commonly used as primary standards (e.g., potassium acid phthalate, arsenic trioxide) may be available as "Primary Standard Grade". These will have a very accurate assay of near 100%. High purities for specialized analysis are sometimes available, such as "Pesticide Grade", "HPLC Grade", "Spectrophotometric Grade", etc. These are more important for trace organic and inorganic analysis. Also, Aldrich Chemical Company (one of the major US supplies of specialized organic chemicals) offers a general top-of-the-line purity called "Gold Label Grade".
Reagents can become easily contaminated when used by a large number of people. Therefore, it is important that great care be exercised in handling high-purity reagents, even if some of the reagent must be wasted following each use. Solid reagents should be transferred directly from their bottle to a weighing bottle or weighing paper by carefully tilting and rotating the bottle so that a fine flow of crystals or powder is created. If a spatula must be used it should be scrupulously clean and dry. Excess reagent must be discarded. Never return excess reagent to the original bottle!
Liquid reagents are best used by pouring a slight excess into a small beaker that has been previously rinsed with the reagent. The required amount can then be pipetted from the beaker. The excess reagent should be discarded. Never return excess to the original reagent bottle, and never pipet directly from a communal liquid reagent bottle.
Table 11.3
Standard Concentrated Acids and Bases
|
Reagent |
Molecular Weight. |
% by Weight. |
Molarity |
|
Acetic Acid, Glacial |
60.05 |
99.5 |
17.4 |
|
Hydrochloric Acid |
36.5 |
36 |
11.6 |
|
Nitric Acid |
63.02 |
71 |
16.0 |
|
Phosphoric Acid, Ortho |
98 |
85 |
14.7 |
|
Sulfuric Acid |
98.1 |
96 |
18.0 |
|
Ammonium Hydroxide |
17.0 |
28 as NH3 |
14.8 |
|
Sodium Hydroxide |
40.0 |
50 |
19.1 |
F. WASTE DISPOSAL
For a listing of acceptable waste disposal practices as UMass, refer to the brochure entitled, "Waste Management at UMass," available at the Division of Environmental Health and Safety (N-414 Morril, 5-2682). Briefly, wastes are divided into five categories, general waste, recyclable materials, chemical waste, radioactive waste, and biohazardous waste. General waste includes non-recyclable paper, glass and plastic. These can be placed in an ordinary trash recepticle. However, glass should be placed inside a "Glass Only" box lined with a plastic bag. These are available from the building custodian or EH&S. Ordinary notebook paper or bond, as well as computer paper may be recycled. These should be stored in cardboard boxes for later pick-up (call 5--0618). Most chemcial wastes may be classified as either liquid organic or aqueous. Liquid organic wastes should be stored in a glass container with a screw cap. Often an empty solvent bottle can become a recepticle for used solvent. Avoid mixing solvents and organic liquids. Waste bottles should be labeled with an EH&S "Hazardous Waste" label, tightly capped, and stored until pick-up in the bottom shelf of the vented solvent cabinet in Marcus Rm. 3N. Small liquid organic waste bottles may be stored in the back of a hood if they are used on a daily basis. Aqueous wastes not containing hazardous substances may be flushed down a drain after pH neutralization. Hazardous aqueous mixtures must be placed in a labeled bottle and stored until pick-up by EH&S.
G. FUNDAMENTAL LABORATORY PROCEDURES
Quantitative Transfer of Solids and Liquids. In quantitative environmental analysis it is common that solids and liquids are transferred from one vessel to another. When this is done for the preparation of standard solutions or as a preparative step in a quantitative method, accurate results depend on a complete transfer. Both solids and liquids may be transferred from one vessel (weighing dish, beaker, etc.) to a second vessel with a constricted opening (volumetric flask, erlenmeyer flask, etc.) by pouring with the aid of a funnel. The last remaining material may be transferred by a current of distilled water from a washbottle.
Preparation of Standard Solutions. Weigh the desired quantity of standard substance. For greatest accuracy, this quantity should be larger than 1 gram. Fill a volumetric flask about 1/3 full with distilled water. Then, quantitatively transfer this substance to the flask and add distilled water until it is about 2/3 full. Swirl with the cap in place until the standard is completely dissolved. Fill so that the bottom of the meniscus just touches the etched mark on the neck. Be careful not to overfill. A distilled water washbottle is especially useful at this point. Some prefer to use a disposable pasteur pipet filled from a small beaker of distilled water for better control. Finally, cap and invert 10 times to assure complete mixing. Standard solutions of less than 1 gram per liter may be prepared by a single dilution, or serial dilutions of a directly prepared concentrated (i.e., >1g/L) standard.
Very dilute standard solutions used in trace environmental analysis may require Milli-Q water rather than simple distilled water. In this case, the use of plastic washbottles may also be unacceptable (contamination from plasiticizers, etc.). The use of a disposable pasteur pipet filled with Milli-Q water is the preferred alternative.
REFERENCES
APHA, AWWA, WPCF (1985) Standard Methods for the Examination of Water and Wastewater, APHA, Washington, 16th edition, pp. 3-7.
NSC (1988) "Selection and Use Guidelines for Chemically Impervious Gloves," Safety and Health, National Safety Council, June, pp. 57.
Perkins, J.L. (1987) "Chemical Protective Clothing: I. Selection and Use," App. Indust. Hyg. 2, (6) November
Sawyer, C.N. & P.L. McCarty (1978) Chemistry for Environmental Engineers, McGraw Hill Publ,. pp. 279-290, 343-350.
Furniss, B.S., et al. (1989) Vogel's Textbook of Practical Organic Chemistry, 5th Ed., Longman Scientific & Technical, New York.